I started this mod with a Microsoft Intellimouse Explorer. The details herein apply only to this particular model but can easily be adapted to fit any other optical mouse. |
 |
First remove the cover from the mouse by unscrewing the two screws located under the rear feet pads. Once they have been removed the top casing should lift of without too much trouble. There are two tabs located on the interior of the mouse by the front; take care not to break these off as you remove the top. |
 |
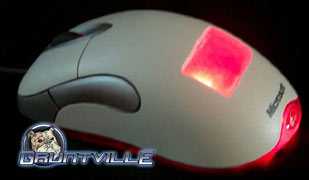
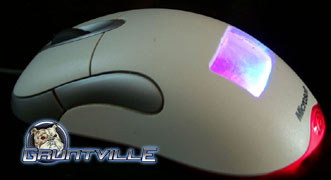
Once you've removed the cover, you'll see that the majority of the area where you palm rests is occupied by bits and pieces used to mount the buttons. To make things less complicated, we're just going to cut a nice window in the open area like so. You can use a variety of materials to create the window but for those with a small budget, I've found a simple substitution. Cut a small piece of plastic from the cover of your average CDR spindle. The natural curve fits the mouse nicely, and it didn't cost you a dime. You can attach the plastic with superglue if you like, but I'd recommend epoxy. Superglue can create a white misty look if applied to most clear plastics. Now you should have something that looks like this. |
 |
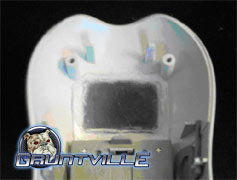
That wasn't too hard was it? Let's take it a step further by adding a second color LED to the current red ones. Below is a view of the inside of the mouse. As you can see, there are two stock red LED's. One located at the center of the board in the white holder, and another all the way at the rear laying flat. You may have noticed that third one in there between the two I just pointed out. That is the one we'll be adding. First you'll need to know the basic parts of an LED; the positive and negative poles. The positive side of a newly purchased LED can be identified by the longer leg. But that doesn't help much with ones that are already installed. Here, you can use a simple rule of thumb. The diagonal line inside goes from negative to positive as the line goes from the bottom to top (relative to the legs pointing down). There is also often a flat edge on the top of the negative leg on the interior. I've blow up a part of the picture below and outlined it so that you can see it more clearly. |
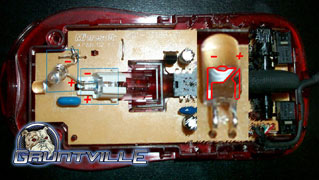 |
With this knowledge, you can begin to solder the new LED in place. You want to connect the legs exactly as I have them shown. With the Positive leg of the new LED attached directly to the Negative leg of the LED in the white housing. Then connect the remaining Negative leg of the new LED to the jumper wire shown. This will put the two in series and allow them both to run off of the same power supply. Once you're all put back together and powered back up, you'll notice that the center Red LED is quite dim. This is because the new LED (blue in this case) is drawing much of the supplied power. Now go ahead and move the mouse a little. You see the Blue LED dim and the center Red LED glow intensely. The movement causes the mouse to give more power to the Red LED and in doing so changes the entire color of the mouse mod. |
 |
|
Back to Guides